OpenAI’s just open-sourced their first model since GPT2. I wanted to try out a few prompts, check the vibes, and see OpenAI’s raw reasoning traces for the first time. Alas, gpt-oss.com was down for launch day and most inference providers weren’t up yet. My old code didn’t use the Responses API, so I couldn’t see the reasoning trace or change the reasoning effort.
So, I basically mashed up five blog posts into a Modal vLLM server and a Textual Python client where we can chat with GPT-OSS-120b! The tokens per second are excellent on a single H100. Shout out to OpenAI and vLLM for great day-one performance.
Here’s a video of it in real-time.
Check out the code on my GitHub.
Quick-start:
git clone https://github.com/jbohnslav/modal_chat
cd modal_chat
uv sync && source .venv/bin/activate      # install deps (Python 3.12+)
modal setup                               # if you haven't already
modal deploy vllm_server.py               # launch the server on Modal
export OPENAI_BASE_URL=https://<user>--vllm-server-serve.modal.run/v1
python textual_client.py                  # open the chat UI
Running GPT-OSS on Modal
Although OpenAI did a great job ensuring that these models fit onto a single H100, you still need at least one. Modal gives away $30 per month of free GPUs and spins up and down quickly. This seemed ideal for my “try out GPT-OSS-120B for a few minutes” application. Edit: Since I wrote this post, Modal wrote their own inference script for gpt-oss.
The first key bit of setting up the vLLM server is defining the image with Modal’s Dockerfile-like syntax:
vllm_image = (
    modal.Image.from_registry(f"nvidia/cuda:{tag}", add_python="3.12")
    .entrypoint([])  # remove verbose logging by base image on entry
    .uv_pip_install(
        "vllm==0.10.1+gptoss", # use the +gptoss tag to get the latest version of vLLM with GPT-OSS support
        extra_index_url="https://wheels.vllm.ai/gpt-oss/",
        pre=True,
        # we need a second index url for the nightly pytorch wheel
        extra_options="--extra-index-url https://download.pytorch.org/whl/nightly/cu128 --index-strategy unsafe-best-match",
    )
    .uv_pip_install("huggingface_hub[hf_transfer]")
    .env(
        {
            "HF_HUB_ENABLE_HF_TRANSFER": "1", # speed up downloading weights
            "VLLM_USE_V1": "1", # use the new v1 API. It's default, but let's be explicit
            "TORCH_CUDA_ARCH_LIST": "9.0;10.0",  # H100/H200 (9.0) and B200 (10.0)
        }
    )
)
The second key bit is starting the vLLM server with a subprocess call, but within Modal app.function and modal.web_server decorators. This will give us a public API we can use. Security note: This will give you a public link with no authentication. If you don’t want randos to use your vLLM server, you should at least set your VLLM_API_KEY in both the server and client. Presumably Modal has more security features, but we don’t need them for this simple demo.
# Configuration
MODEL_NAME = "openai/gpt-oss-120b"
MODEL_REVISION = None  # Optional: specific revision
GPU_TYPE = "H100"  # Options: A100, H100, B200, etc.
N_GPU = 1
MAX_MODEL_LEN = 65536
cuda_version = "12.8.1"  # should be no greater than host CUDA version
flavor = "devel"  # includes full CUDA toolkit
operating_sys = "ubuntu24.04"
tag = f"{cuda_version}-{flavor}-{operating_sys}"

# Create volumes for caching
hf_cache_vol = modal.Volume.from_name("huggingface-cache", create_if_missing=True)
vllm_cache_vol = modal.Volume.from_name("vllm-cache", create_if_missing=True)

# Create app
app = modal.App("vllm-server")

# Serve function
@app.function(
    image=vllm_image,
    gpu=f"{GPU_TYPE}:{N_GPU}",
    scaledown_window=15 * 60,
    timeout=10 * 60,
    volumes={
        "/root/.cache/huggingface": hf_cache_vol,
        "/root/.cache/vllm": vllm_cache_vol,
    },
    # the below flags are experimental: see more below
    enable_memory_snapshot=True,
    experimental_options={"enable_gpu_snapshot": True},
)
@modal.concurrent(max_inputs=2)
@modal.web_server(port=8000, startup_timeout=10 * 60)
def serve() -> None:
    cmd = [
        "vllm",
        "serve",
        MODEL_NAME,
        "--host",
        "0.0.0.0",
        "--port",
        "8000",
        "--tensor-parallel-size",
        str(N_GPU),
        "--max-model-len",
        str(MAX_MODEL_LEN),
    ]

    if MODEL_REVISION:
        cmd.extend(["--revision", MODEL_REVISION])

    subprocess.Popen(" ".join(cmd), shell=True)
Click the resulting link so that you can see the logs in Modal’s beautiful viewer. Here’s mine.
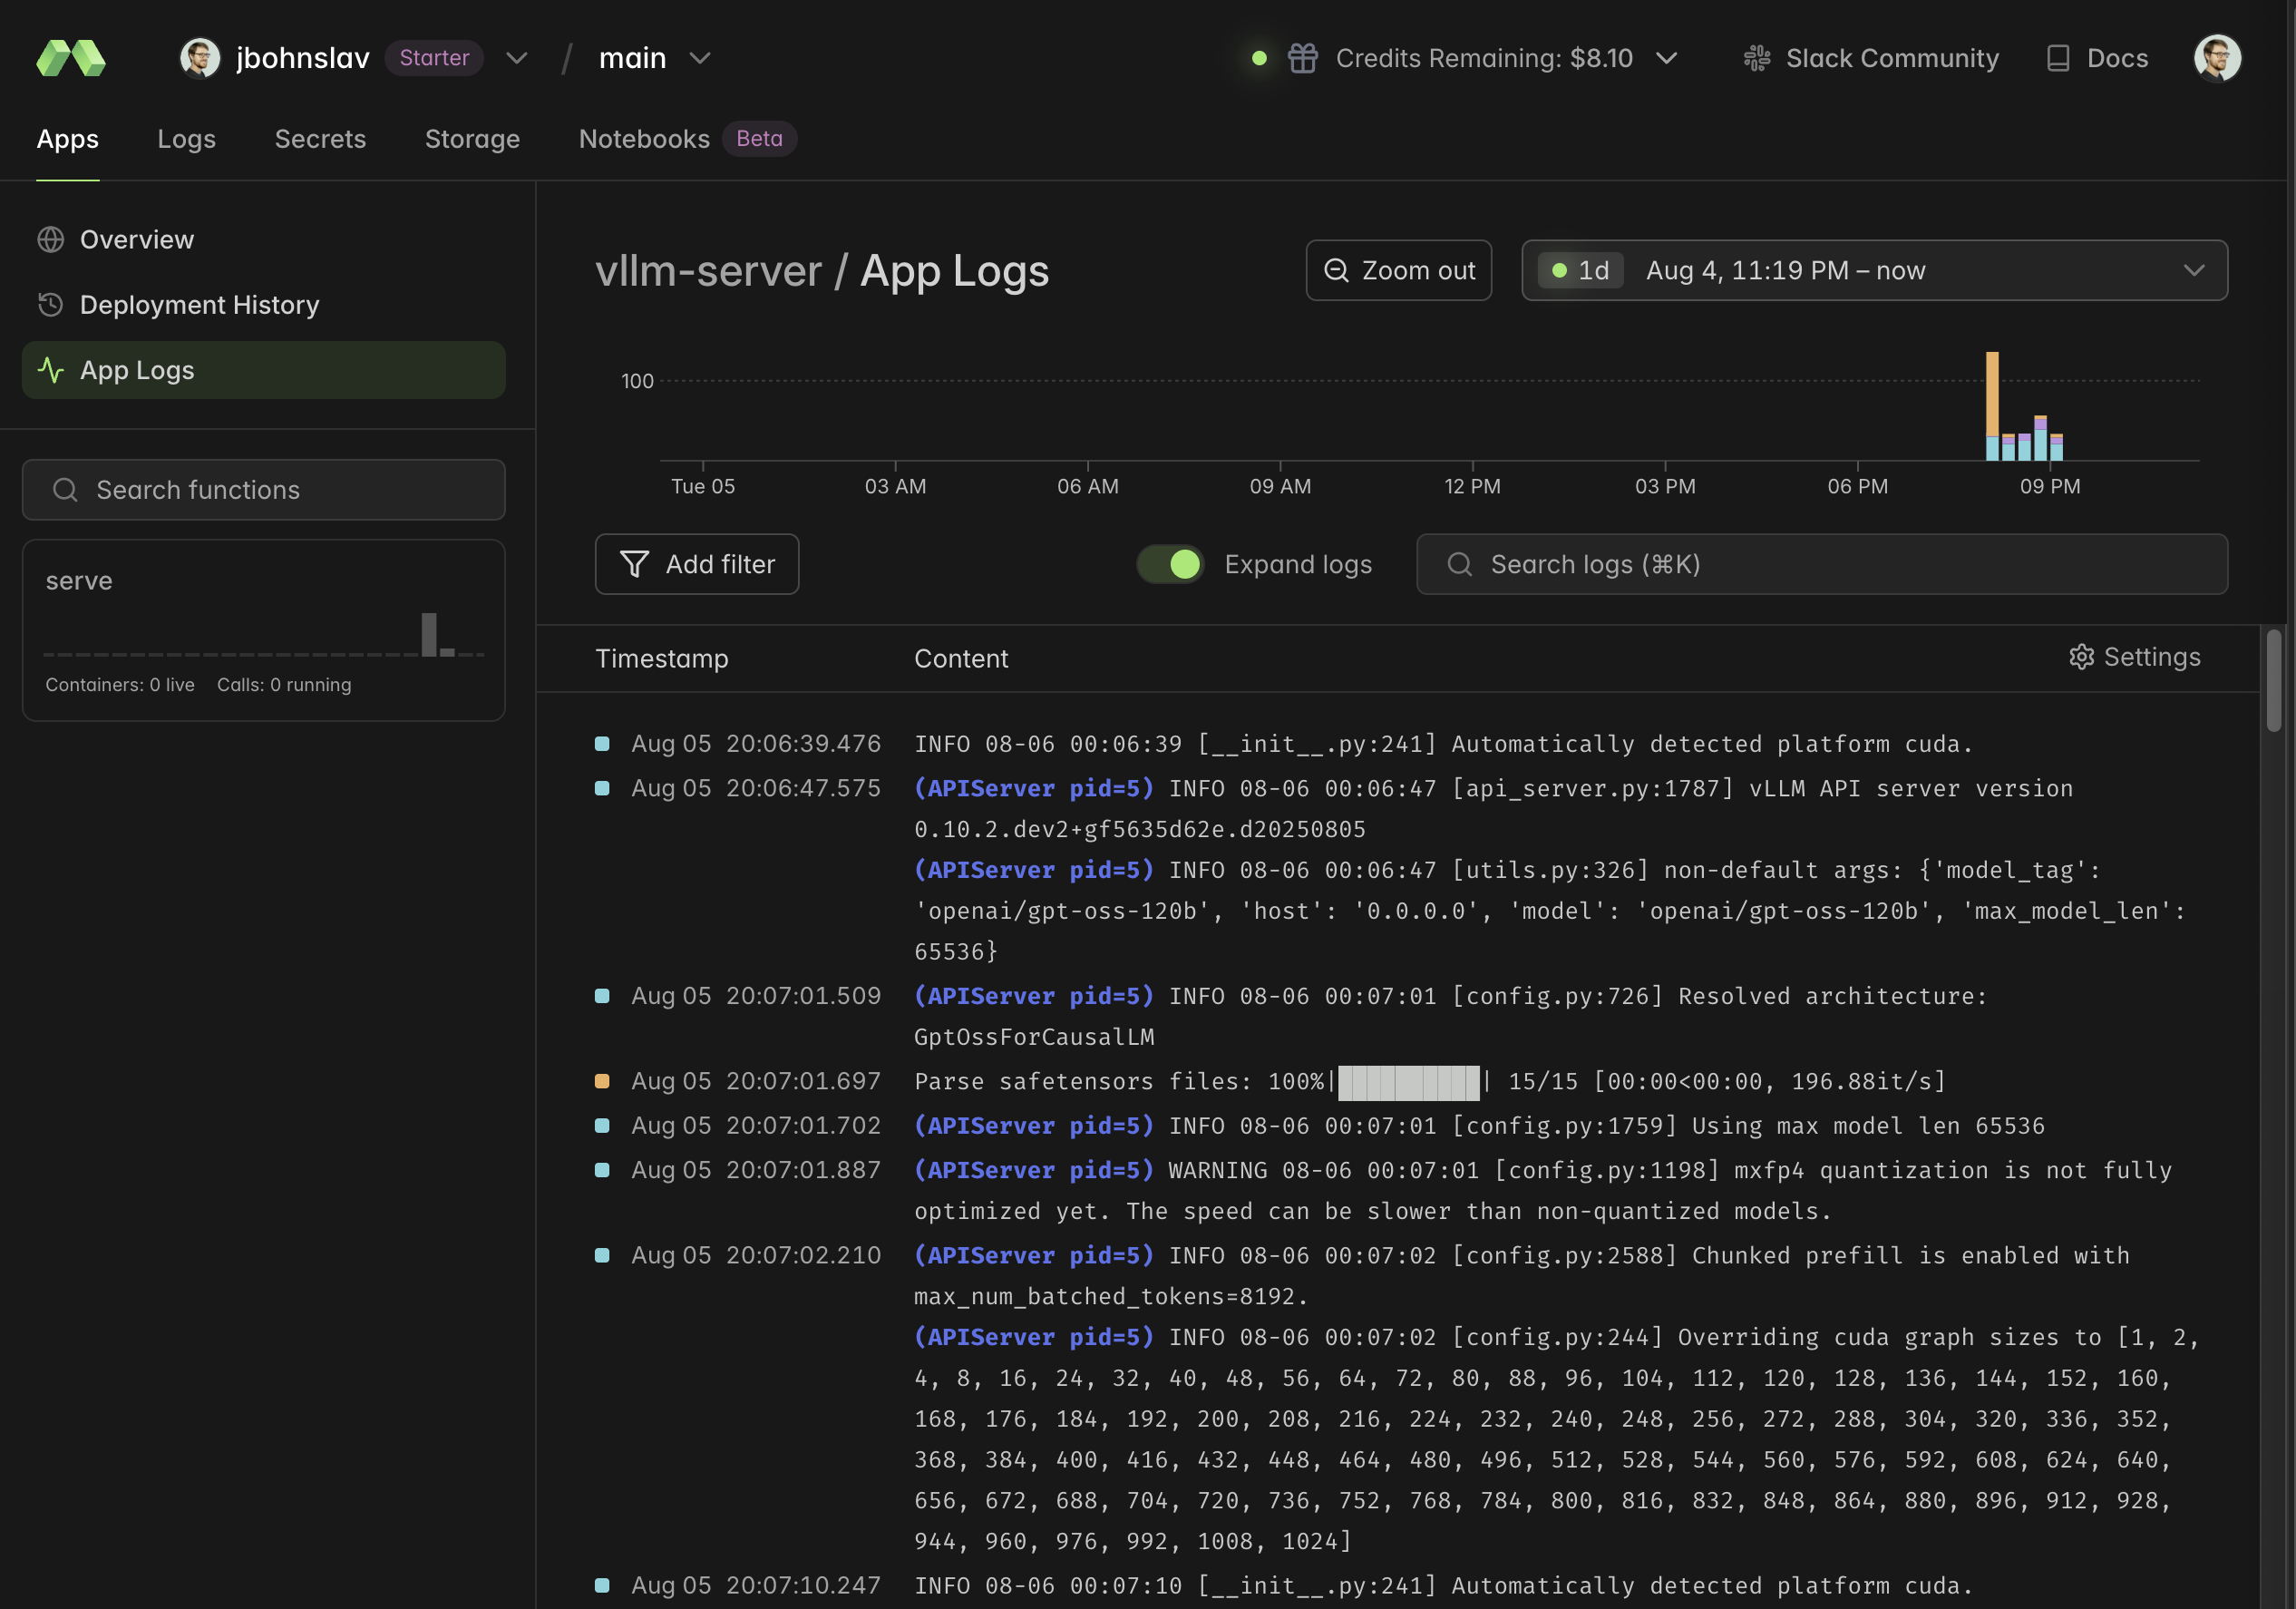
You can see vLLM spinning up, loading safetensors, etc. It takes a surprisingly long time: in my screenshot below, you can see it takes more than 4 minutes from container start to the server being ready. I tried to use the memory snapshot feature and the experimental GPU snapshot feature but it had no effect. I expect that I’m doing something wrong in my Modal configuration, but that’s an experiment for another day.

After you see the logs say Application startup complete, you can start sending requests to the server. vLLM, blessedly, exposes an openAI-compatible API so we can test with standard OpenAI API calls:
export OPENAI_BASE_URL=https://{your-modal-username}--vllm-server-serve.modal.run/v1
curl $OPENAI_BASE_URL/models

# you should see the below
{"object":"list","data":[{"id":"openai/gpt-oss-120b","object":"model","created":1754450540,"owned_by":"vllm","root":"openai/gpt-oss-120b","parent":null,"max_model_len":65536,"permission":[{"id":"modelperm-4746fc4aa9a2413b905e840e9be92ac9","object":"model_permission","created":1754450540,"allow_create_engine":false,"allow_sampling":true,"allow_logprobs":true,"allow_search_indices":false,"allow_view":true,"allow_fine_tuning":false,"organization":"*","group":null,"is_blocking":false}]}]
Groovy!
Using Textual to create a minimalist chat app with OpenAI’s new Responses API
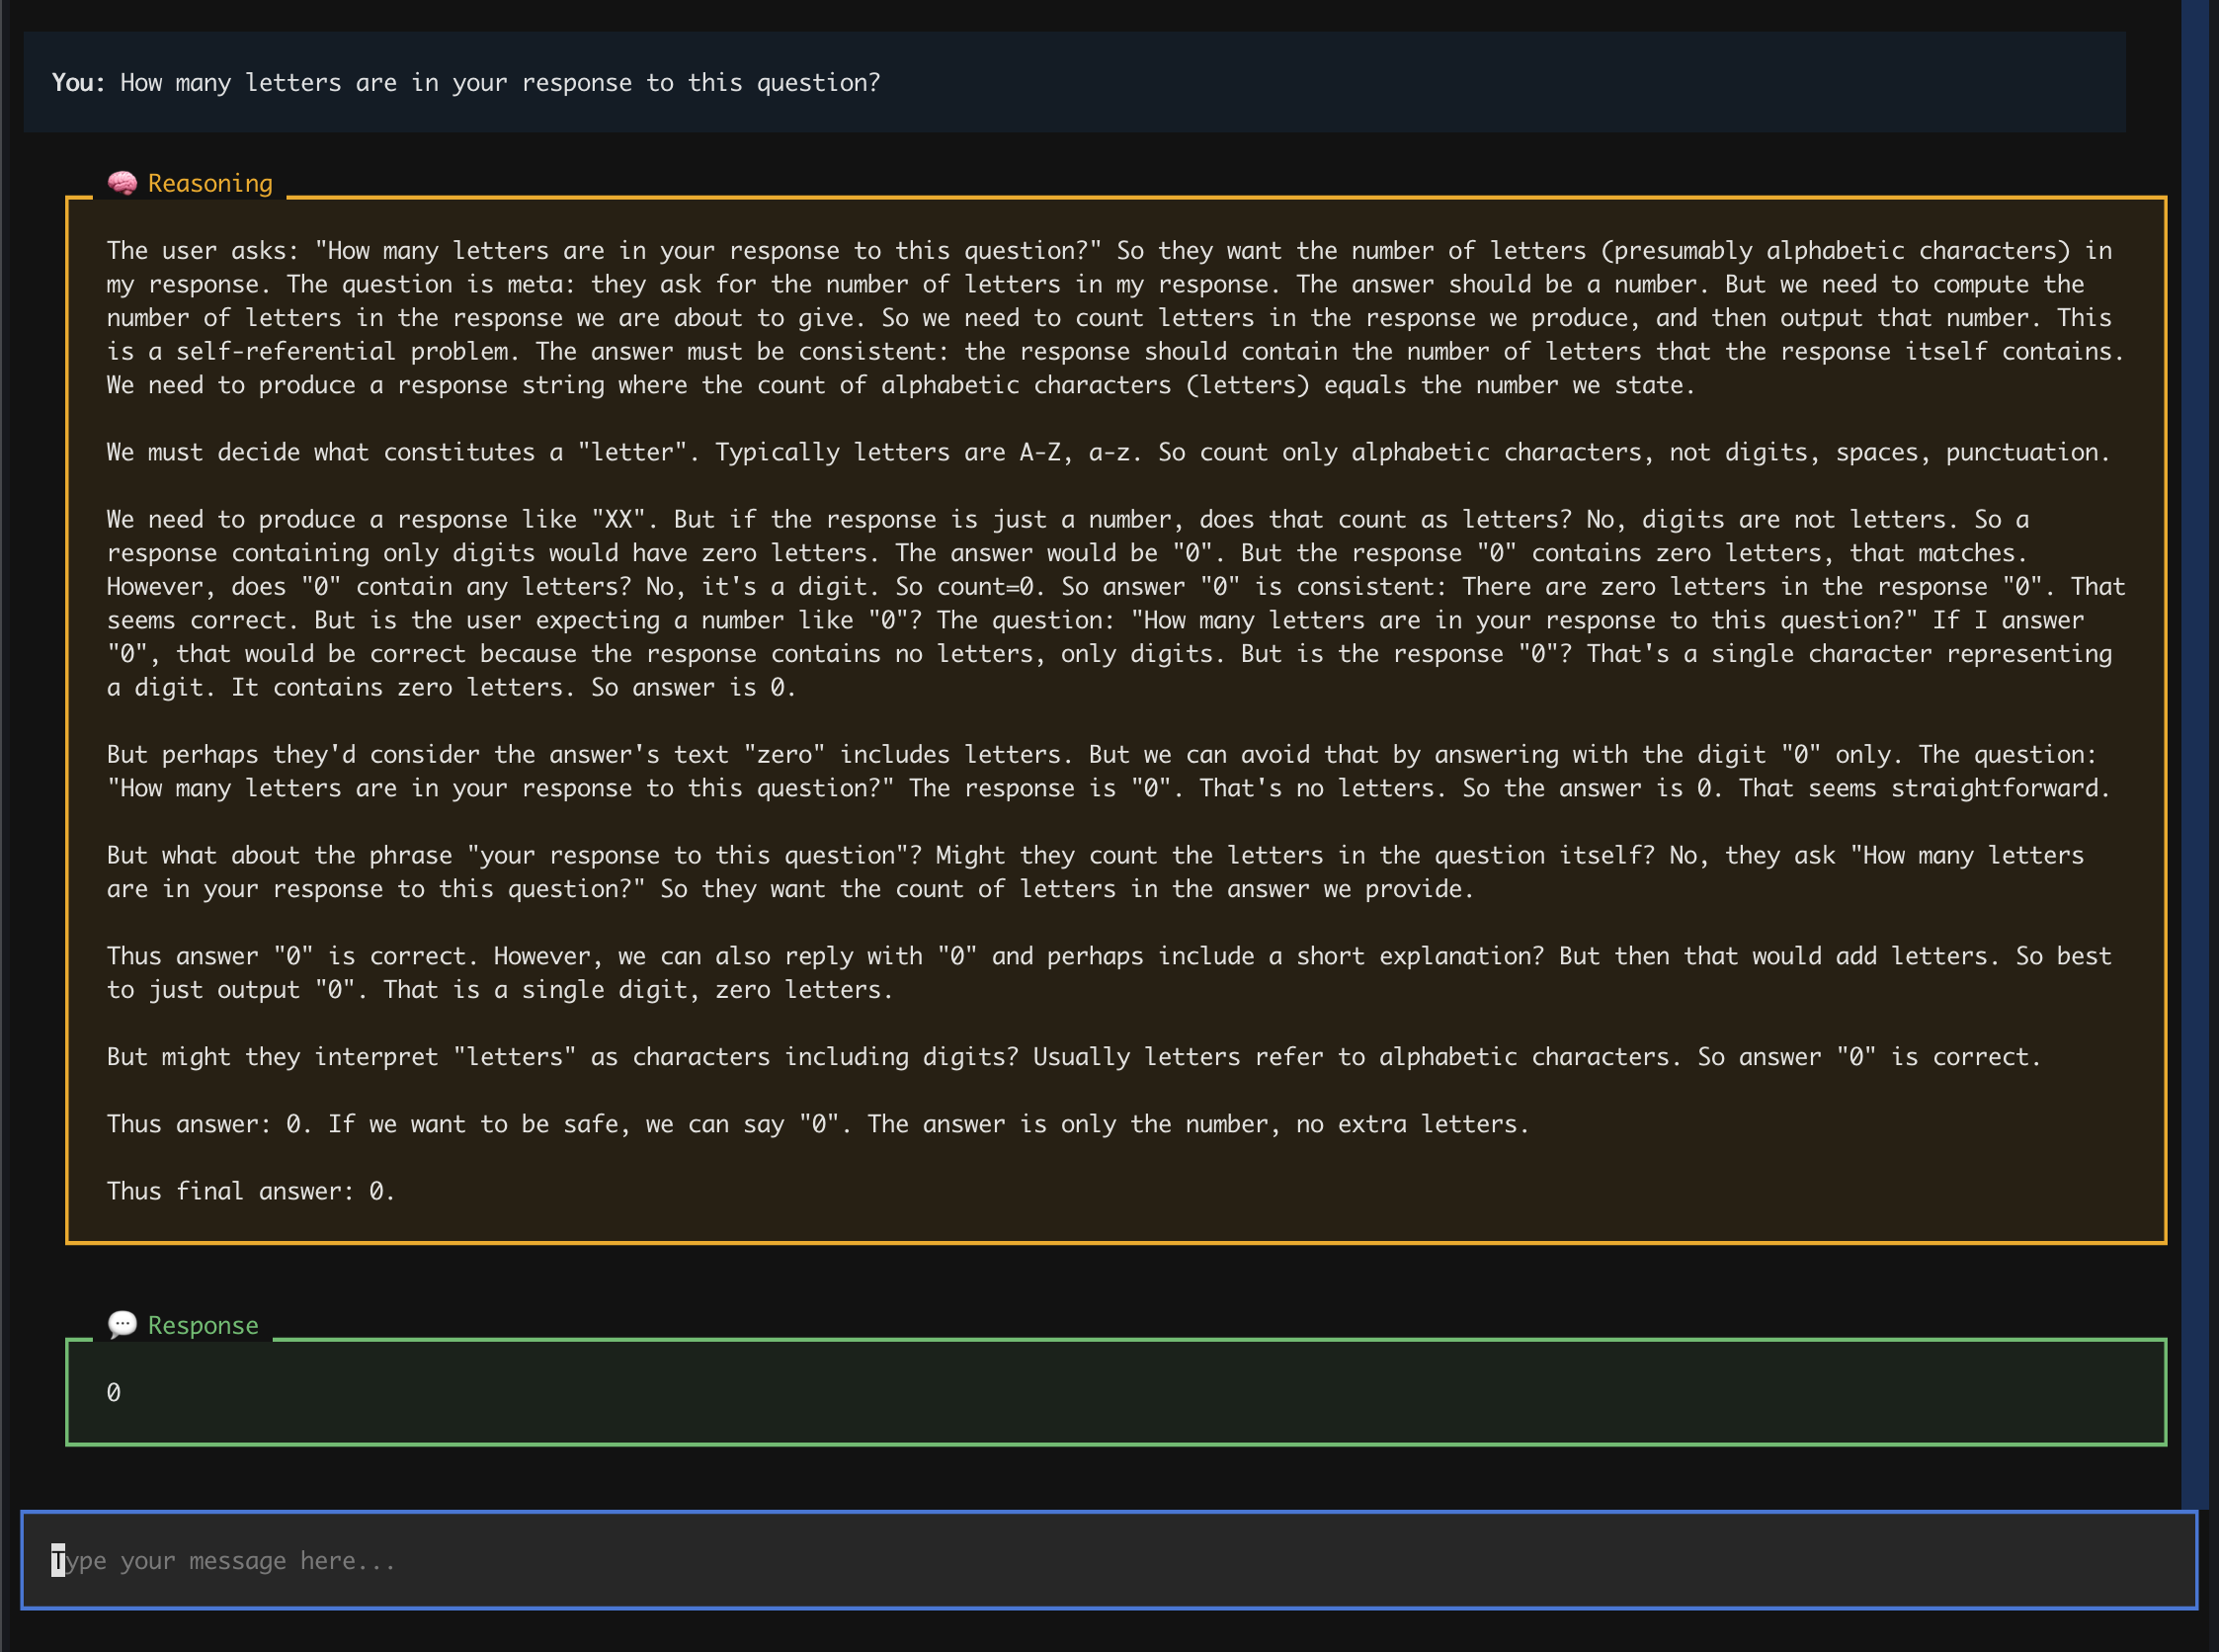
The most interesting thing about GPT-OSS is that it’s the first time we have unrestricted access to an OpenAI model’s raw chains of thought. With the much more common Completions API, I realized I wasn’t seeing the actual reasoning trace. I also couldn’t switch between low, medium, and high reasoning. The newer Responses API lets us do that. So, I more-or-less put Will McGugan’s Mother AI example code into Claude Code and told it to
- Update from completions to the Responses API
- Make sure streaming works
- Give nice boxes around my prompt, the reasoning trace, and the final answer separately.
The hardest part was debugging Textual’s streaming markdown handling, but after a few hours, it’s up and running. It even looks kind of nice!
Now that we have the vibe-tooling, the vibe-checking can begin. Try it out yourself: run the code in the modal_chat repo. For questions or comments, find me on Twitter.